
Introduction
In remote visual inspection (RVI) and non-destructive testing (NDT), the quality of the image captured by an industrial videoscope directly determines whether fine defects are detected or missed. Cracks, corrosion, pitting, scoring, weld discontinuities, foreign object damage, and early wear often appear as subtle variations in color, texture, or brightness. Two fundamental controls—white balance and exposure—play a decisive role in making these variations visible and reliable.
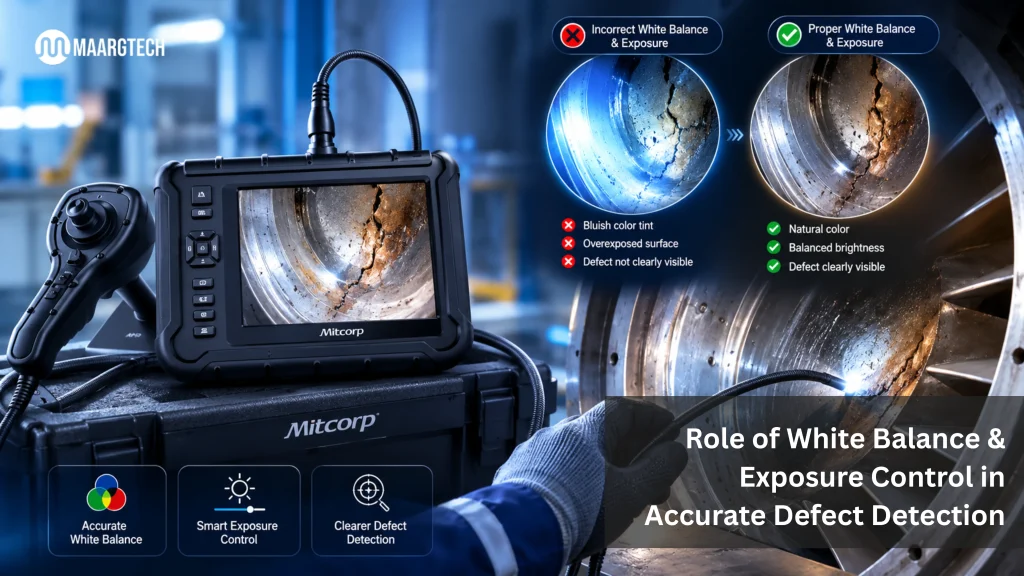
Proper management of these settings ensures that the digital image accurately represents the true condition of the internal surface. When they are incorrect, color casts can mask corrosion or material changes, while over- or under-exposure can hide edges and surface details. This is why understanding White Balance in Videoscope inspection and exposure control is essential for consistent, high-confidence defect detection across automotive, aerospace, power generation, petrochemical, and manufacturing applications.
Modern industrial environments present challenging lighting conditions: dark cavities, highly reflective metals, residual oil films, carbon deposits, and varying distances between the probe tip and the target surface. Without careful adjustment of white balance and exposure, even high-resolution sensors can produce images that look acceptable at first glance but lack the true color fidelity and tonal range needed for accurate evaluation. Investing a few extra seconds in these settings often makes the difference between a borderline indication that is documented and one that is overlooked.
What Is White Balance?
White balance corrects the color temperature of the light illuminating the scene so that neutral surfaces (white or gray) appear neutral on the display. Industrial environments rarely provide pure white light. LED illumination at the probe tip, residual heat, oil films, carbon deposits, or ambient light leaking into access ports can introduce warm (yellow/orange) or cool (blue) color casts.
Without correction, a yellowish cast may make mild corrosion or heat tinting harder to distinguish from the base metal. A bluish cast can alter the perceived color of coatings, residues, or oxidation. Accurate White Balance in Videoscope inspection removes these artificial tints so that the colors displayed match the actual surface appearance as closely as possible. This color fidelity is especially important when inspectors evaluate material condition, coating integrity, or contamination type.
In practice, many operators set white balance once at the beginning of an inspection and forget to re-check it as conditions change. A better approach is to treat it as a living adjustment—revisit it whenever LED intensity, working distance, or surface reflectivity changes significantly.
What Is Exposure Control?
Exposure determines how much light reaches the camera sensor and how the resulting brightness levels are processed. In a confined, often highly reflective metallic cavity, light intensity varies dramatically between bright specular highlights and deep shadows. Automatic exposure can struggle in these conditions, producing clipped highlights (loss of detail in bright areas) or crushed shadows (loss of detail in dark areas).
Manual or semi-automatic exposure control lets the operator adjust brightness, gain, and sometimes shutter-related parameters so that critical surface features remain within the usable dynamic range. Combined with adjustable tip LED intensity, good exposure control prevents blooming on shiny welds or polished surfaces while still revealing fine texture in darker zones.
Exposure and illumination work hand-in-hand. Simply turning the LEDs to maximum is rarely the best solution. Lowering the light level slightly and fine-tuning exposure often yields higher contrast and better detail retention, especially on reflective metals.
Why White Balance and Exposure Control Matter for Defect Detection
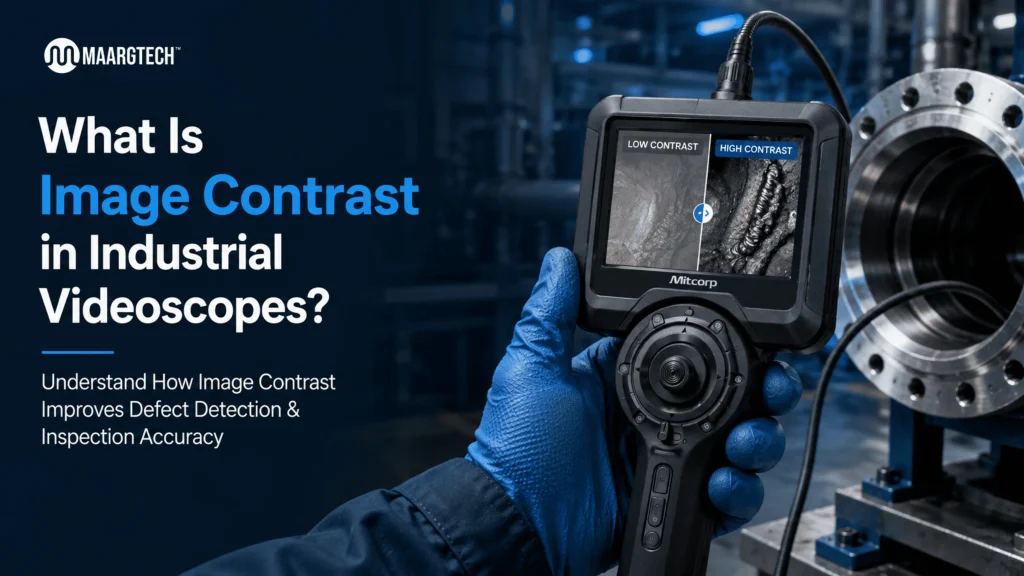
Defect detection relies on both geometric detail (edges, depth, texture) and chromatic information (color differences that indicate oxidation, heat damage, chemical attack, or residue). Poor white balance can shift colors enough to reduce contrast between a defect and its background. Incorrect exposure can flatten that contrast entirely by pushing important tones into pure white or pure black.
When White Balance in Videoscope inspection is set correctly and exposure is optimized, hairline cracks stand out more clearly against the surrounding material, early-stage pitting becomes distinguishable from surface texture, and color-based indicators of corrosion or thermal damage are rendered accurately. The result is higher probability of detection, more reliable pass/fail decisions, better documentation for trending and compliance, and reduced need for secondary inspections.
These controls also reduce operator fatigue. Images that are consistently well-balanced and properly exposed are easier to interpret during long inspection sessions. Over a full shift, the cumulative effect of clearer images leads to faster, more confident decision-making and fewer “uncertain” findings that require re-inspection.
How White Balance and Exposure Work Together
White balance and exposure are interdependent. Changing LED brightness or working distance alters the amount and sometimes the effective color temperature of light reaching the sensor. After adjusting exposure, it is often necessary to re-check or re-set white balance so that color accuracy is maintained under the new lighting conditions.
Modern industrial videoscopes typically offer:
- Automatic and manual white balance options
- Manual exposure, brightness, and gain controls
- Real-time image enhancement that can further improve visible detail once the fundamental exposure and color balance are correct
Operators who systematically set exposure first (to place the critical surface tones in the middle of the histogram or waveform range) and then refine white balance achieve more consistent results than those who rely solely on full auto modes. This disciplined sequence becomes second nature with a little practice and significantly improves image repeatability between different technicians.
Common Mistakes and How to Avoid Them
Several recurring errors reduce image quality:
- Leaving LEDs at full brightness in reflective cavities, causing blooming and loss of highlight detail.
- Relying only on automatic white balance without verifying the result on a neutral area.
- Changing working distance or articulation angle without re-adjusting exposure.
- Ignoring lens contamination—oil or debris on the tip affects both color and brightness.
- Capturing only one image of an indication instead of several under slightly different settings.
Avoiding these mistakes is straightforward: start with moderate illumination, verify white balance when conditions change, keep the tip clean, and capture multiple views of any suspect area.
Practical Factors That Influence Results
Several conditions common in industrial inspections affect both settings:
- Highly reflective metal surfaces create strong specular highlights that challenge exposure.
- Oil, carbon, moisture, or residual process fluids can alter both brightness and color.
- Distance from the tip to the target changes illumination intensity and can introduce fall-off.
- Probe tip cleanliness is critical—any film on the lens degrades both color and contrast.
- Ambient temperature and residual heat can influence LED output characteristics over time.
Keeping the probe tip clean, selecting appropriate tip adapters for the viewing geometry, and making small articulations to change the angle of incidence often improve the starting image before electronic adjustments are applied. These mechanical steps complement the electronic controls and frequently produce the largest improvement in image quality.
Best Practices for Accurate Settings
- Begin with moderate LED intensity rather than maximum brightness to avoid immediate blooming.
- Adjust exposure so that the areas of interest show good mid-tone detail without clipping.
- Perform white balance on a neutral reference area when available, or use the system’s manual white-balance function on a representative surface.
- Re-check both settings after changing working distance, articulation angle, or LED level.
- Capture both stills and short video clips under the optimized settings for documentation.
- Train operators on the specific menu structure and real-time feedback tools of their videoscope model.
- Periodically review saved images to confirm that color and brightness remain consistent across different inspections and operators.
Consistent application of these steps makes White Balance in Videoscope inspection and exposure control routine rather than occasional adjustments. Over time, standardized procedures improve inter-operator consistency and strengthen the overall reliability of the RVI program.
Benefits Across Industries
In aerospace, correct color balance and exposure help distinguish heat tinting, FOD marks, and coating wear on turbine blades and combustors. In automotive engine and transmission work, they reveal scoring, deposits, and casting defects more clearly. Power-generation and petrochemical inspections benefit from better visibility of boiler-tube or heat-exchanger corrosion and weld quality. Across all sectors, reliable image quality supports predictive maintenance, reduces unplanned downtime, and strengthens compliance records.
When measurement tools (stereo or 3D) are used, accurate white balance and exposure also improve the reliability of the underlying image data. Clear edges and correct tonal values make it easier for the measurement algorithms to lock onto features and produce repeatable results.
MAARGTECH Solutions for High-Quality Imaging
MAARGTECH supplies Mitcorp industrial videoscopes designed for demanding RVI environments. Models such as the X2000 HD and related systems provide high-resolution imaging, adjustable LED illumination, manual exposure controls, and white-balance functions that support accurate defect detection. Durable, articulating probes with IP-rated construction handle the oily, reflective, and confined conditions typical of industrial inspections while remaining cost-effective for Indian and international customers.
These tools give operators the real-time control needed to optimize White Balance in Videoscope inspection and exposure under varying conditions, delivering clear, color-accurate images that improve inspection confidence. Combined with good technique and proper training, they help teams achieve more consistent and reliable results.
Conclusion
White balance and exposure control are not secondary menu items—they are foundational to accurate defect detection in remote visual inspection. When set correctly, they ensure that color and brightness information on the display faithfully represent the internal surface, allowing inspectors to identify and evaluate defects with greater reliability.
By combining good technique with equipment that provides accessible manual controls, inspection teams achieve more consistent results, better documentation, and stronger asset integrity programs. Prioritizing proper White Balance in Videoscope inspection alongside exposure management is a practical step toward higher-quality RVI outcomes and fewer missed indications.
See More. Detect Better. Inspect Smarter.
Choose advanced MITCORP videoscope technology from MAARGTECH for detailed, accurate, and dependable industrial inspections.
📞 +91-97572 76307 | 📧 sales@maargtech.com
Frequently Asked Questions (FAQ'S )
Why is white balance important in videoscope inspections?
Correct white balance removes unwanted color casts caused by LED lighting, oil films, heat, or carbon deposits. This ensures true surface colors are displayed accurately, making it easier to identify corrosion, heat damage, residues, coating issues, and other defects that rely on color information.
How does incorrect exposure affect defect detection?
Poor exposure can wash out bright reflective areas (blooming) or darken shadowed regions, hiding fine cracks, pitting, scoring, and surface texture. Proper exposure keeps critical details within the usable brightness range so defects remain visible and measurable.
Should I use automatic or manual white balance and exposure settings?
Automatic modes work for quick checks, but manual or semi-manual control of white balance and exposure generally delivers more consistent and accurate results in reflective, confined, or oily industrial environments. Most experienced inspectors prefer manual adjustments for critical inspections.
How often should I adjust white balance during an inspection?
You should re-check and adjust white balance whenever there is a significant change in LED intensity, working distance, articulation angle, or surface condition. Many operators perform a quick white-balance verification at the start of each major inspection zone for best results.
Can poor white balance or exposure reduce measurement accuracy?
Yes. Stereo and 3D measurement tools rely on clear edges and consistent tonal values. Incorrect color balance or exposure can make edges less distinct and reduce the precision and repeatability of defect size measurements.